
AprilAire 700 Installation Manual: A Comprehensive Guide
This detailed guide provides comprehensive instructions for installing the AprilAire 700 series humidifier, ensuring optimal performance and humidity control within your home environment.
Professional installation is always recommended, but this manual assists qualified individuals in correctly setting up the unit, referencing specific wiring diagrams and safety protocols.
Proper ductwork preparation, utilizing the provided installation template, is crucial for efficient operation, alongside correct water supply and drain line connections for long-term reliability.
Understanding the AprilAire 700 Humidifier
The AprilAire 700 is a whole-house humidifier designed to integrate seamlessly with your existing forced-air heating system, providing consistent and comfortable humidity levels throughout your home during the dry winter months. Its operation is intrinsically linked to the furnace blower; the humidifier activates when the blower runs and a call for humidity is signaled by the control system.
This model, along with the 700M variant, offers flexibility in installation, accommodating both supply plenum and return duct configurations. Understanding these options is key to a successful installation, as the chosen method impacts ductwork modifications and overall system efficiency. The humidifier control, whether manual (700M) or automatic, plays a vital role in regulating humidity output, requiring initial setup and seasonal adjustments.
Proper functionality relies on a correctly installed water supply line, a properly routed drain line, and secure electrical connections, all detailed within the comprehensive installation manual.
Key Features and Benefits of the Model 700
The AprilAire 700 boasts several key features contributing to enhanced home comfort and air quality. Its capacity to add significant moisture to the air alleviates dryness, reducing static electricity, preventing damage to wood furnishings, and easing respiratory discomfort. Installation versatility is a major benefit, allowing for adaptation to various HVAC system layouts via supply plenum or return duct mounting.
The availability of a manual (700M) or automatic control option provides users with tailored humidity management. The automatic control simplifies operation, while the manual version offers precise adjustments. Furthermore, the unit’s design facilitates easy access for maintenance and filter replacement, ensuring long-term performance and efficiency.
Proper installation, guided by the detailed manual, maximizes these benefits, preventing issues like freezing or condensation and optimizing energy consumption.
Safety Precautions Before Installation
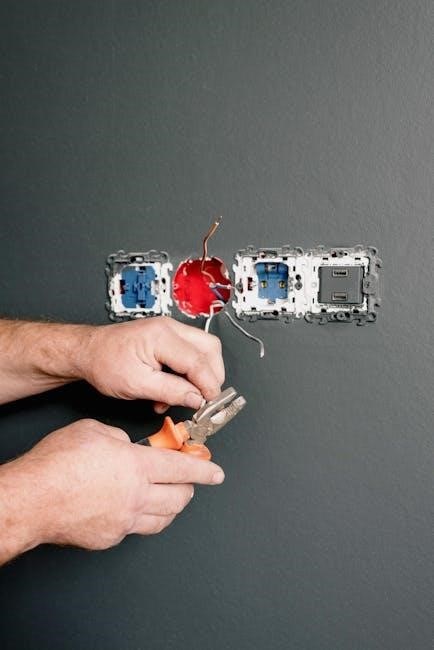
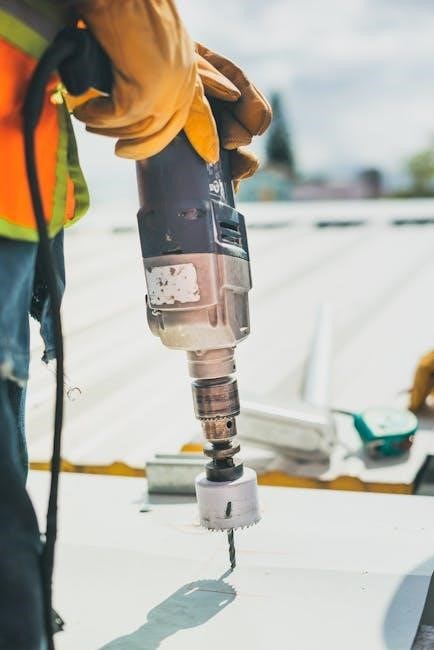
Prior to commencing the AprilAire 700 installation, several critical safety precautions must be observed. Always disconnect electrical power to the furnace before beginning any wiring connections to prevent electrical shock. Exercise caution when cutting ductwork, wearing appropriate safety glasses and gloves to avoid injury from sharp edges.
Ensure the water supply line is properly shut off before making any connections to prevent water damage. Review the wiring diagram thoroughly and adhere to all local electrical codes. Be mindful of potential hazards associated with working in confined spaces, ensuring adequate ventilation.
Carefully read and understand all warnings and instructions within the installation manual before proceeding, prioritizing personal safety and preventing damage to the equipment.
Installation Process: Step-by-Step
Begin by carefully selecting the optimal installation location, then proceed with precise duct cutting using the template, followed by secure component mounting and connections.
Choosing the Right Location for Installation
Selecting the appropriate location is paramount for optimal AprilAire 700 performance. The humidifier can be installed on either the supply plenum or the return duct, offering flexibility based on your HVAC system’s configuration.
Supply plenum installation generally provides more consistent humidity distribution, while return duct installation may be simpler in certain setups. Consider accessibility for future maintenance and servicing when making your decision.

Ensure sufficient space around the installation site for comfortable work and proper airflow. Avoid locations prone to freezing temperatures or excessive moisture. The control, if using a 700M model, can be mounted within the return duct or conveniently on a wall in a living space.
Carefully assess the ductwork’s structural integrity to support the humidifier’s weight and withstand vibrations during operation. Proper placement minimizes potential issues and maximizes the humidifier’s effectiveness.
Supply Plenum vs. Return Duct Installation
The AprilAire 700 offers installation versatility, accommodating either supply plenum or return duct configurations. Supply plenum mounting typically delivers more even humidity distribution throughout the home, as it introduces moisture directly into the heated air stream.
Return duct installation can be simpler in some systems, particularly when plenum access is limited. However, it may result in slightly less consistent humidity levels. Consider the existing ductwork layout and accessibility for maintenance.
Plenum installations require careful consideration of airflow patterns to prevent condensation. Return duct installations benefit from the natural cooling effect, reducing the risk of moisture buildup.
Ultimately, the best choice depends on your specific HVAC system and preferences. Both methods, when executed correctly, provide effective whole-house humidification.
Duct Cutting and Preparation Using the Installation Template
Precise duct cutting is paramount for a successful AprilAire 700 installation. Utilize the provided installation template to accurately mark the opening in either the supply plenum or return duct. Ensure the template is securely positioned and aligned before cutting.
Carefully cut along the marked lines using appropriate sheet metal snips or a duct cutter. Deburr any sharp edges to prevent damage to the humidifier or ductwork. A clean, smooth opening is essential for a proper seal.
The template guides the correct size and shape for optimal airflow and prevents restrictions. Proper preparation minimizes air leakage and maximizes humidification efficiency.
Double-check the opening dimensions against the humidifier’s specifications before proceeding with mounting. A well-prepared duct ensures a secure and effective installation.

Component Installation
Securely assemble the humidifier, connect the water supply line, and route the drain line according to the manual, ensuring proper alignment and leak prevention.
Humidifier Assembly and Mounting
Begin by carefully unpacking all components and verifying their presence against the parts list in the installation manual. Assemble the humidifier body, ensuring all connections are snug but not overtightened, following the diagram provided.
Next, select a suitable mounting location – either the supply plenum or return duct – based on your system configuration. Utilize the provided installation template to accurately mark the cutout dimensions, preventing any airflow restrictions.
Once the cutout is complete, securely mount the humidifier to the ductwork using appropriate fasteners, ensuring a stable and vibration-free installation. Double-check the mounting bracket’s alignment to guarantee proper operation and prevent potential issues down the line.
Finally, confirm the humidifier is level and securely fastened before proceeding to the water supply connection.
Water Supply Line Connection
Locate a suitable cold water supply near the humidifier, typically a ½-inch pipe. Install a saddle valve or a dedicated shut-off valve to provide a consistent water source. Ensure the water supply pressure is within the recommended range specified in the manual – typically between 20 and 120 PSI.
Connect the water supply tubing to the humidifier’s water inlet, using appropriate fittings and clamps to prevent leaks. Carefully route the tubing, avoiding any kinks or sharp bends that could restrict water flow.
Inspect all connections thoroughly for tightness and proper sealing. Slowly turn on the water supply, checking for any leaks at the connections. Address any leaks immediately by tightening fittings or replacing components as needed.
Proper water supply connection is vital for the humidifier’s functionality and prevents potential water damage.
Drain Line Installation and Routing

Connect the drain line to the humidifier’s drain outlet, ensuring a secure and leak-proof connection. Utilize the provided drain tubing or a suitable replacement with the correct diameter. Route the drain line to a floor drain, standpipe, or other approved drainage point.
Maintain a continuous downward slope throughout the entire length of the drain line to facilitate proper drainage. Avoid any upward bends or sags that could cause water to accumulate and potentially freeze. Secure the drain line to prevent movement or accidental disconnections.
Ensure the drain line terminates in a location that prevents water from flowing back into the humidifier or causing water damage. Proper drain line installation is crucial for preventing water-related issues.

Electrical Connections
Carefully follow the wiring diagram, connecting the humidifier to the furnace blower’s power source, ensuring proper voltage and grounding for safe operation.
Wiring Diagram Overview
The AprilAire 700 humidifier’s electrical connection requires careful attention to the wiring diagram, typically found both within the humidifier’s packaging and the accompanying control installation instructions.
Generally, the wiring involves connecting the humidifier control to the furnace blower’s 24-volt power supply, utilizing the ‘R’ (power) and ‘C’ (common) terminals.
A separate wire connects the control to the humidifier’s solenoid valve, activating the water flow when humidity is demanded.
Always disconnect power to the furnace before commencing any electrical work, and strictly adhere to local electrical codes and safety regulations.
Double-check all connections for tightness and proper insulation, preventing shorts or malfunctions. Refer to the detailed diagram for specific wire colors and terminal designations.
Connecting to the Furnace Blower
Establishing a secure connection to the furnace blower is vital for the AprilAire 700’s operation, as it relies on the blower’s airflow to distribute humidified air throughout the home.
Typically, this involves tapping into the blower’s 24-volt power supply, utilizing the existing wiring harness to provide power to the humidifier control.
Ensure the furnace is completely powered off before making any connections, and identify the appropriate terminals for power (R) and common (C).
Use wire connectors to securely join the humidifier control wires to the furnace wiring, ensuring a reliable electrical pathway.
Properly insulate all connections to prevent shorts and maintain safety, and verify the blower motor’s compatibility with the humidifier’s voltage requirements.
Humidifier Control Installation (Model 700M)
The AprilAire 700M manual humidifier control offers flexible mounting options, allowing installation within the return duct or directly on a wall in a living space.
For duct mounting, ensure the control is positioned for easy access and visibility, while maintaining adequate airflow around the unit.
Wall mounting requires removing the knob and cover, then securing the control to the wall using appropriate screws and anchors.
Wiring connections are crucial; connect the control to the humidifier and furnace blower, following the detailed wiring diagram provided in the instructions.
After installation, carefully replace the knob and cover, and proceed with system checkout to verify proper operation and humidity control settings.

System Checkout and Initial Setup
Verify proper operation by adjusting control settings, preventing freezing, and addressing common installation issues for optimal performance and consistent humidity levels throughout your home.
Control Settings and Initial Adjustment
During the first heating season, the AprilAire humidifier control requires initial setup for accurate humidity regulation. Begin by familiarizing yourself with the control’s interface, noting the adjustable humidity settings and operational modes. The control is typically installed within the cold air return duct, or optionally, mounted on a wall in a living space.
Start with a moderate humidity setting, such as the midpoint of the control’s range, and observe the system’s performance over 24-48 hours. Monitor for signs of condensation on windows or walls, which indicate excessive humidity. If condensation occurs, reduce the humidity setting incrementally until it is eliminated. Conversely, if the air feels dry, gradually increase the setting.
Remember to remove the knob and cover on manual controls (Model 700M) for access to adjustment features. Consistent monitoring and fine-tuning are essential to achieve comfortable and healthy indoor humidity levels throughout the winter months.
Preventing Freezing and Condensation
To prevent freezing of the AprilAire 700 humidifier, ensure proper insulation of the water supply line, particularly in unheated areas. Consistent airflow across the evaporator pad is also critical; avoid obstructions in the ductwork that could restrict air movement. Regularly check the drain line for clogs, as a blocked drain can lead to water accumulation and potential freezing.
Condensation can occur if humidity levels are too high. Monitor windows and walls for moisture, and adjust the humidifier control accordingly. Proper ventilation in the home can also help mitigate condensation. Ensure the furnace blower operates effectively to distribute humidified air evenly.
Addressing these issues proactively will maximize the humidifier’s efficiency and prevent potential damage, ensuring a comfortable and healthy indoor environment throughout the heating season. Consistent monitoring is key to optimal performance.
Troubleshooting Common Installation Issues
If the humidifier doesn’t operate after installation, verify the electrical connections to the furnace blower and control. Confirm the humidifier control is calling for humidity and the furnace blower is functioning. Check the wiring diagram for accuracy, ensuring all connections are secure.
For water leaks, inspect the water supply line connections and drain line for tightness and proper routing. Ensure the drain line isn’t kinked or clogged. A faulty solenoid valve could also be the source of a leak, requiring replacement.
If freezing occurs, double-check insulation and airflow. Low humidity output may indicate a clogged evaporator pad or incorrect control settings. Refer to the owner’s manual for detailed troubleshooting steps and available resources.

Resources and Support
Access the AprilAire 700 owners manual and detailed installation guide online for comprehensive assistance. Repair help and additional resources are readily available.
AprilAire 700 Owners Manual
The AprilAire 700 Owners Manual serves as a vital companion to your whole-house humidifier, offering essential information beyond the initial installation process. It details routine maintenance procedures, such as filter replacement and cleaning, to ensure consistent and efficient operation throughout the heating season.
Understanding the control settings is paramount for achieving desired humidity levels, and the manual provides clear instructions on adjusting these settings for optimal comfort and preventing potential issues like condensation or freezing. It also includes a troubleshooting section addressing common concerns, helping you diagnose and resolve minor problems independently.
Furthermore, the manual emphasizes the importance of regular inspections and provides guidance on identifying potential wear and tear on components. Accessing the digital version of the AprilAire 700 Owners Manual is highly recommended for quick reference and detailed diagrams, ensuring a long and trouble-free lifespan for your humidifier.
AprilAire 700 Installation Manual (Detailed)
The AprilAire 700 Installation Manual (Detailed) provides a comprehensive, step-by-step guide for professionals and experienced DIYers undertaking the installation of this whole-house humidifier. It begins with crucial safety precautions, emphasizing electrical hazards and proper handling of components. Detailed diagrams illustrate the correct placement of the humidifier relative to the furnace and ductwork, covering both supply plenum and return duct installation options.
Specific instructions are provided for precise duct cutting using the included installation template, ensuring a secure and airtight fit. The manual meticulously outlines water supply line connections, drain line routing, and the critical electrical wiring procedures, including a clear wiring diagram for connecting to the furnace blower.
It also dedicates sections to the installation of the humidifier control (Model 700M), offering guidance on system checkout and initial setup for optimal performance and preventing common issues like freezing or condensation.
Repair Help and Available Resources
Should issues arise post-installation, AprilAire offers a wealth of resources to assist with troubleshooting and repair. The official AprilAire website hosts a comprehensive FAQ section addressing common problems and providing potential solutions for the Model 700 humidifier. Access to the complete AprilAire 700 Owners Manual and the detailed AprilAire 700 Installation Manual are readily available for download, offering valuable diagnostic information.
For more complex repairs, AprilAire maintains a network of authorized dealers and service technicians equipped to handle any issue. Contacting these professionals ensures qualified assistance and genuine replacement parts. Online forums and communities dedicated to HVAC systems can also provide peer-to-peer support and advice.
Remember to always prioritize safety when attempting any repairs, disconnecting power before working on electrical components and following all manufacturer guidelines;